The Gallery
Design Process
-
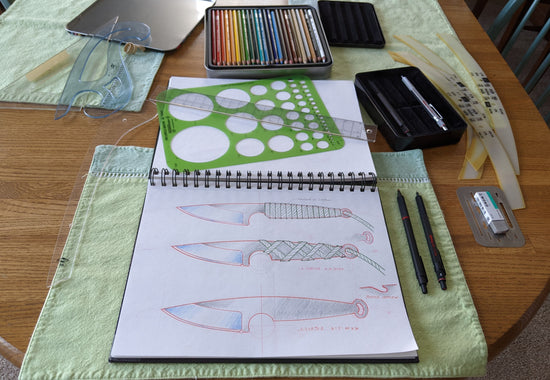
The design process can be a bit messy at times. A final design does not spring forth into the world fully formed. There are many steps in the process from concept to completion. Good old fashioned sketching, with pencil and paper, is still the fastest way to get idea out of the mind and into the real world.
-
Concept Sketches
Concept sketches allow us to quickly examine size, shape and function.
-

Style Sketches
Style sketches allow us to drill down into some of the design details. This is stricktly about aesthetics and tells us nothing about ergonomics.
-
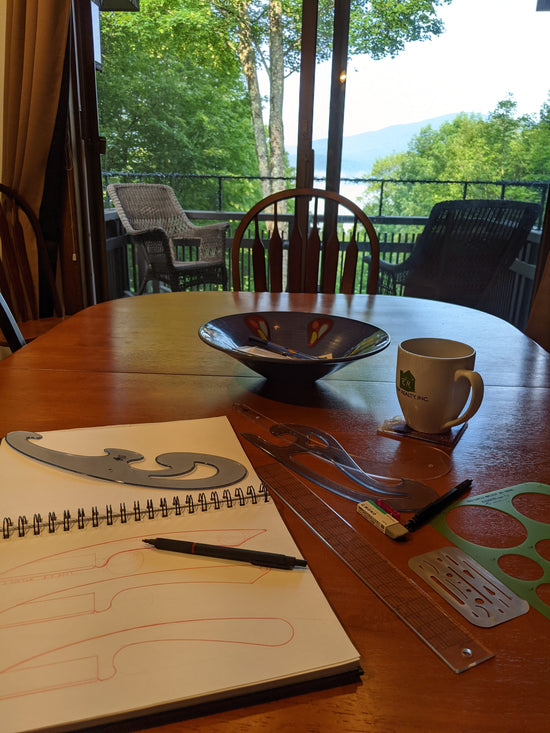
The nice thing about sketching with pencil and paper is you can do it anywhere, even on vacaton.
-
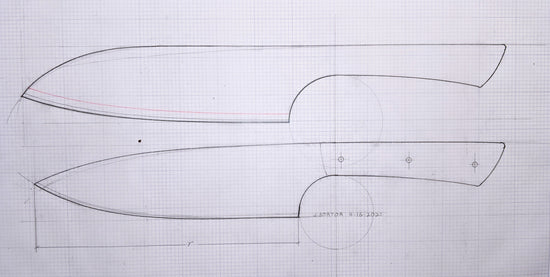
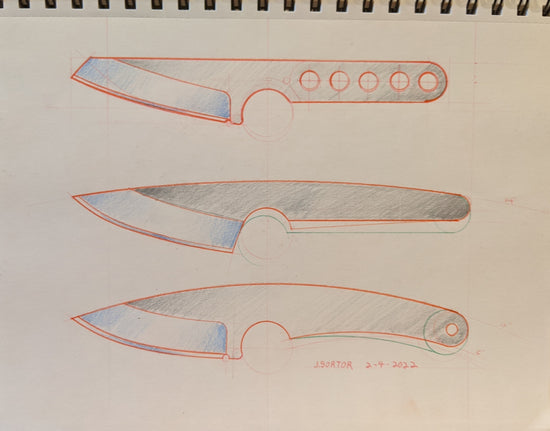
Control Line Drawings
This is what used to be called Mechanical Drawing and has largly been replaced by Computer Aided Drawing or CAD. Control Line Drawings are where we start better defining details of the design: sizes, shape, and ergonomics. How does the end user engage with and manipulate the knife.
-
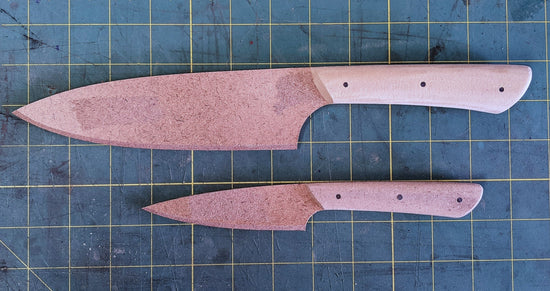
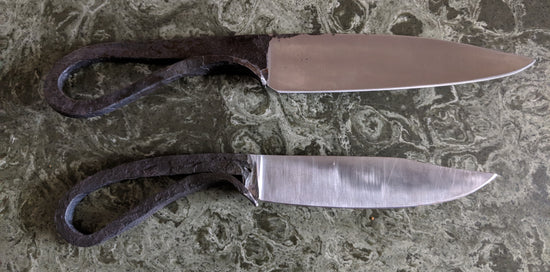
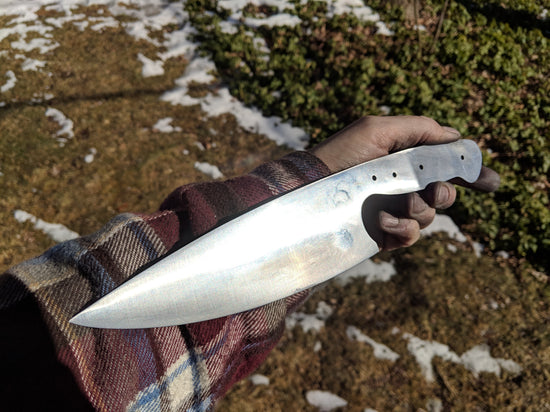
Mock-up
A mock-up is a quick model made from light weight materials. This is the first time we are able to literaly get our hands on the design. This is where we begin to seriously evaluate the ergonomics of the design. How does it feel in the hand and how does it move through medium while cutting? Is the shape of the blade apropriate for the handle?
-
A mock-up next to a finished knife. Note the slight change to blade shape in the final knife.


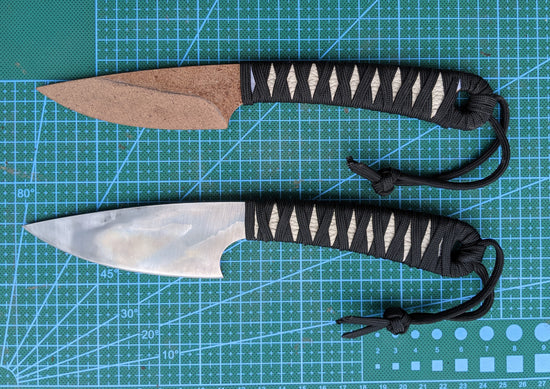
Work In Progress
-
Work In Progress
A pair of kitchen knives in the works.
-
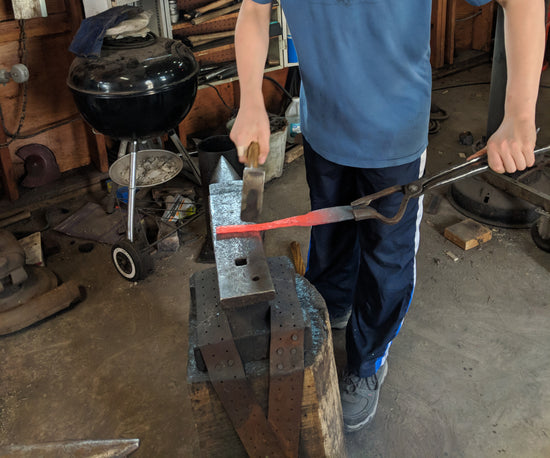
Forging
Forging steel is a hot, dirty and nasty process. But it is strangly rewarding turning a lump of steel into a blade. Plus you get to beat the snot out of things with hammers. Nobody walks out of a forge angry. Exausted and sweat soaked but never angry.
-
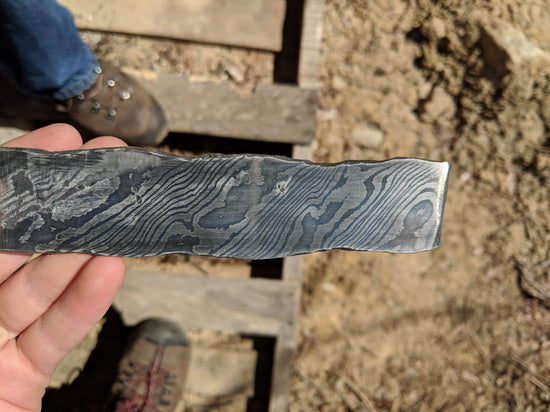
A twisted damascus bar hammered flat and ready to be turned into a blade.
-

Drawing out the tang of a Blacksmith's Blade from the same damascus bar
-
Finished forged blades
A pair of Blacksmith blades, forged by my son and I.
-
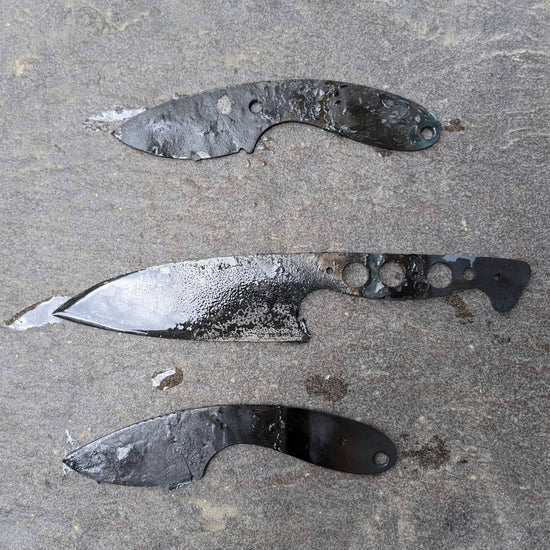
Stock Removal
Stock removal is the process of grinding away all the unwanted material from a steel bar to create the final knife shape. This is more of a sculptural process as opposed to forging. We can only remove material from the original stock shape. No heat or hammering is involved in the process. Pictured are two knife shapes and the surrounding parent steel stock.
-
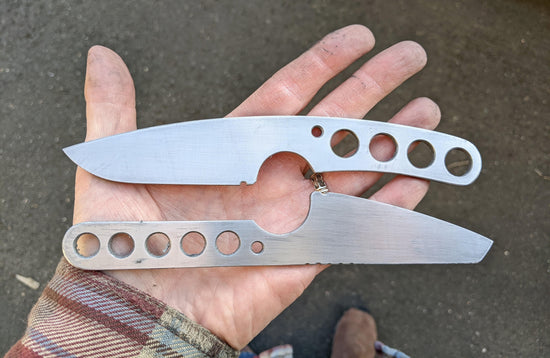
knife shapes removed from steel
Pictured are two blade blanks after removing the parent stock steel.
-

Finished Blade
The finished stock removal knife. Pictured is a Model-5 with no handle material.
-
Hardening by oil quenching
Hardening is the process of taking a soft piece of steel and turning it into a hardened blade. It is often said this is where a blade gains it's soul. Here we have three blades just out of the oil quench.
-

Hardening in an electric kiln
The vast majority of our blades are hardened in an electric kiln. The kiln gives us greater control over the hardening process and it allow us to work with stainless steels, which can not be hardened by oil quenching. An added plus is just how difficut it would be to burn down the building with a kiln. Yes, people do burn down their forges with some regularity using fire and oil quencing. Oil is quite flamible, that's why we use it as fuel.
-

Heat treating colors
When heat treating in an electric kiln we often get some rainbow colors on the blade as a byproduct of the process. Usuallly these colors are ground off while finishing the knife. Occasionaly we leave them in place if they look nice.
-

Tempering
Tempering is the process of reducing the hardness we just created in the quenching process. Freshly quenched blades can be extreamly hard and brittle. To make a usefull blade we need to draw back the hardness to a reasonable level. This is often done in a common kitchen stove. I have even seen it done in a toaster oven, but I don't recomend it. In this image the blade is clamped between two flat steel plates to remove a slight warp picked up in the quenching process.
-
Finished blade
A finished blade after heat treating and final grinding.
-
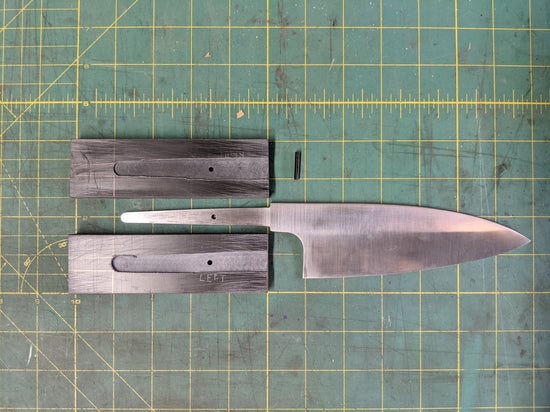
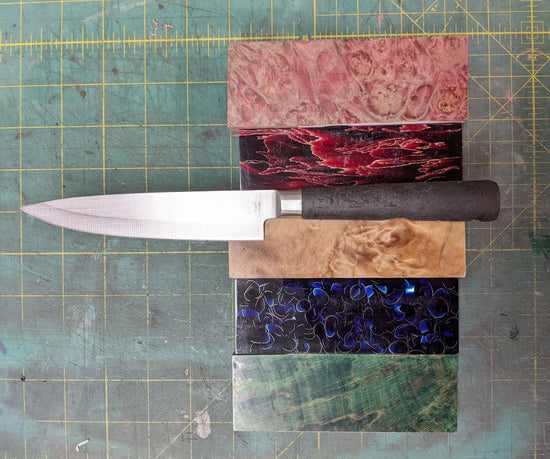
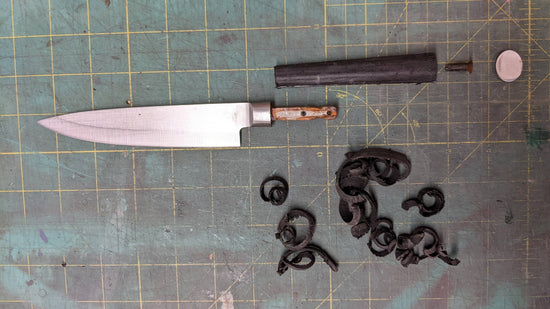
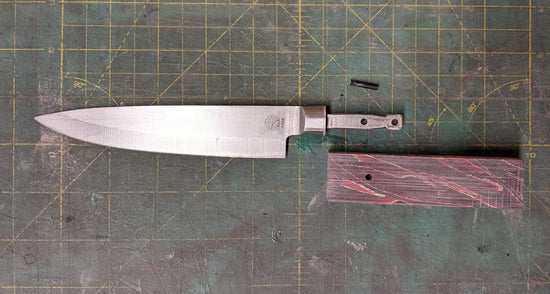
Adding a handle
A finished blade and two halves of the handle ready for assembly
-

Shaping the Handle
The handle material needs to be shaped to fit both the knife and the hand. This can be done before attaching to the knife or after. Often it is a little of both. Pictured are four knives in four diffrent stages of handle fit up.
-
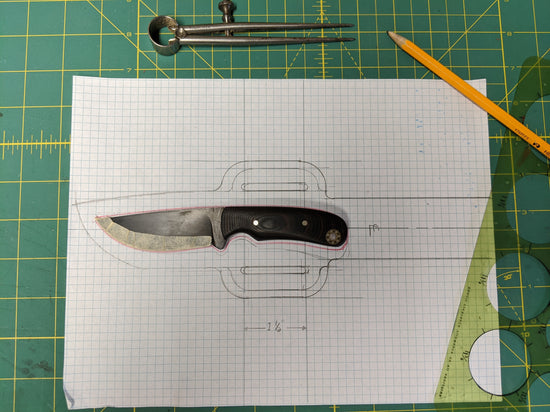
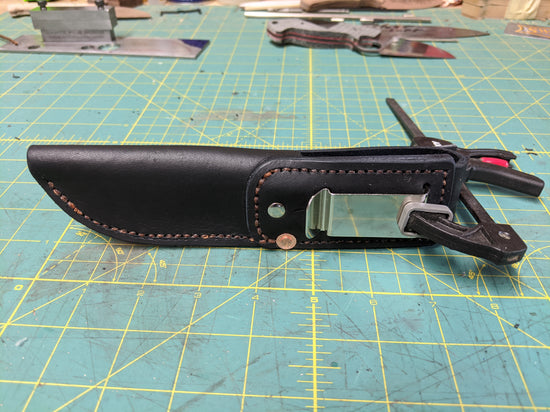
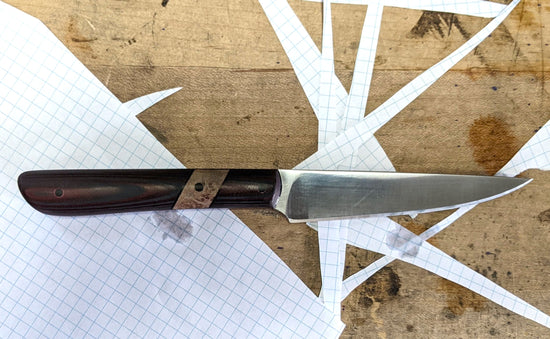
Leather Sheath Design
The design process does not always end when the knife completed. Some knives require a leather sheath to make them portable. Here we see a knife on a sheath pattern layed out on graph paper.
-

Leather Templates
Another knife on the templates that will be used to cut out the leather
-
Assembling the final leather sheath.
The final leather sheath glued and stitched together by hand.
-

Set of kitchen knives
A set of kitchen knives in the works.
-
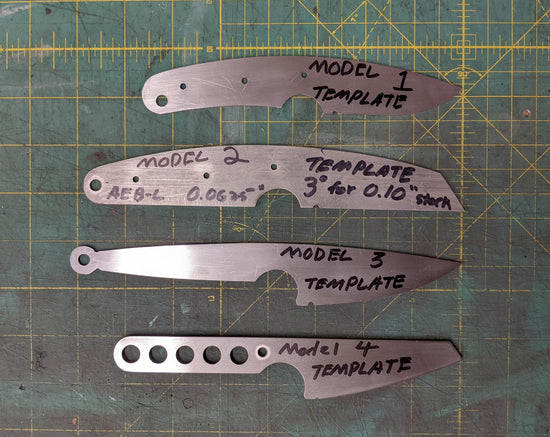
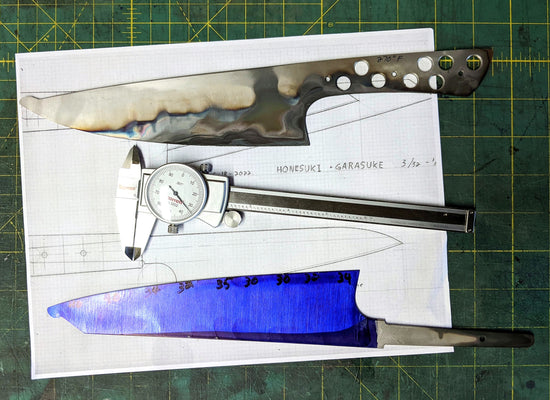
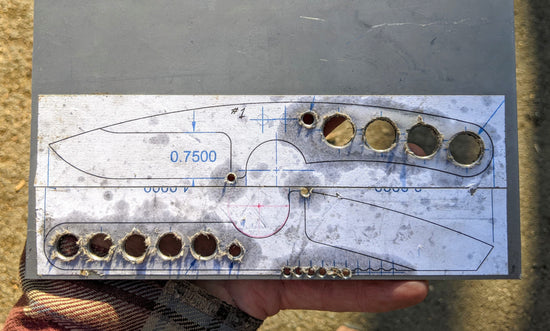
Knife templates
Keeping a set of template in steel allows us to reproduce knives we have made in the past. Pictured are templates for some of our work knives.


Kitchen Knives
-

The humble kitchen knife
The vast majority of what we make are kitchen knives in all sorts of sizes and shapes. We work almost exclusivle in AEB-L stainless steel. Which in my opinion is about the perfect steel for a kitchen knife. You can read more about AEB-L under the About tab at the top of the page.
-

The cleaver an under-utilized kitchen tool
The kitchen cleavers come in a variety of sizes for a variety of purposes. They are not just for butchers breaking down meat. When sized properly, they work on vegtables and cheese just as well.
-
Japanese influence
Many of our knives are clearly inspired by traditional Japanese kitchen knives. However, our knives are not authentic Japanese cutlery for several reasons.
1. We generally make our knives from mono-steel rather than laminated steel common in Japanese knives.
2. We generally make our knives with bevels on both sides. Although we do single beveled knives occasionally.
3. We always make our knives with a double bevel on the cutting edge as opposed to the single bevel common on Japanese knives. -
What we like about Japanese kitchen knives are the very things that set them apart from the traditional European style knives.
1. They are considerably lighter than a comparable European knife. You will notice the difference and appreciate it if you do a lot of prep work.
2. The balance is slightly more forward than that of a comparable European knife. Not enough to make them feel like a cleaver but just enough to notice it is different.
3. Many of them have a flatter profile to the cutting edge that works best with a slicing motion. There are a few modern Japanese kitchen knives with a rounded profile that works well with a rocking cutting action.
4. Japanese knives are thinner than the European equivalent. A knife is nothing more than a wedge. The thinner a wedge is, the more effective will be.
5. Japanese knives are made from a higher grade of steel and heat-treated to greater hardness. They hold an edge longer than European knifes. The downside to this elevated hardness is the risk of chipping the cutting edge. Remember these are slicing blades not choppers. The harder steel also takes longer to sharpen when the time comes. So don’t wait until they are dull to resharpen, touch up the edge when you notice a reduction in sharpness.


Work/Utility Knives
-

Work/Utility Knives
In addition to kitchen knives we also make Work/Utility knives. They tend to be more simplistic in design, to keep them affordable and make them tough enough to stand up to daily work life. Pictured is a Model-3, with a paracrod wrap. The colors on the blade are a side effect of the heat treating process. Sometimes we leave them in place if they look nice.
-

Fancy Work Knives
We sometimes make work knives with fancy handles. They look nice and feel more like a custom knife. Pictured is a Model-1 with jimping on the spine.
-

A simple work knife
Pictured is a Model-4 with a paracord wrapped handle. Simple and effective.
-

A work knife needs a sheath to make it portable.
We make leather sheaths for our work knives, See below for details.


Leather Sheaths
-

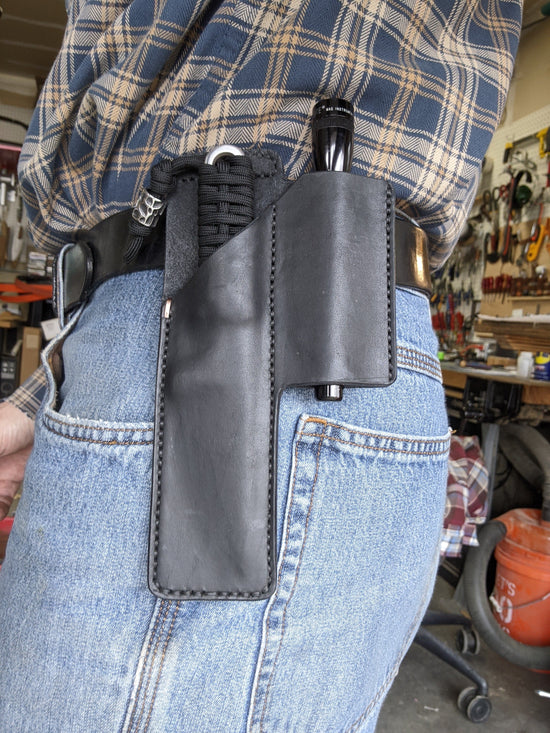
Leather Sheaths
We can make leather sheaths for any of our knives. We use vegtable tanned leather 8-9 oz. weight, aproximatly 1/8" (3mm) thick. Everything is done in-house, even the saddle stitching by hand. Example of a typical EDC sheath.
-
Leather Sheath
Anothe EDC knife and light combination
-

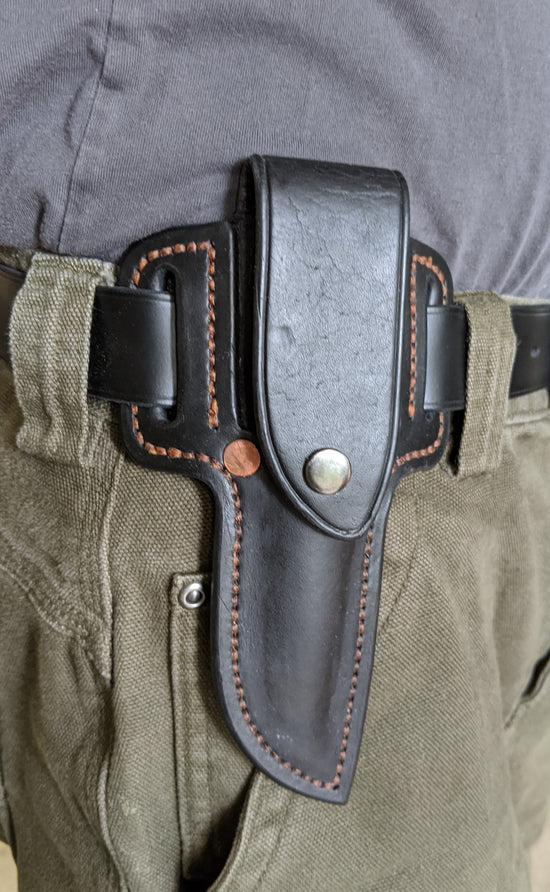
A pair of sheaths for a more traditional belt knife.
-
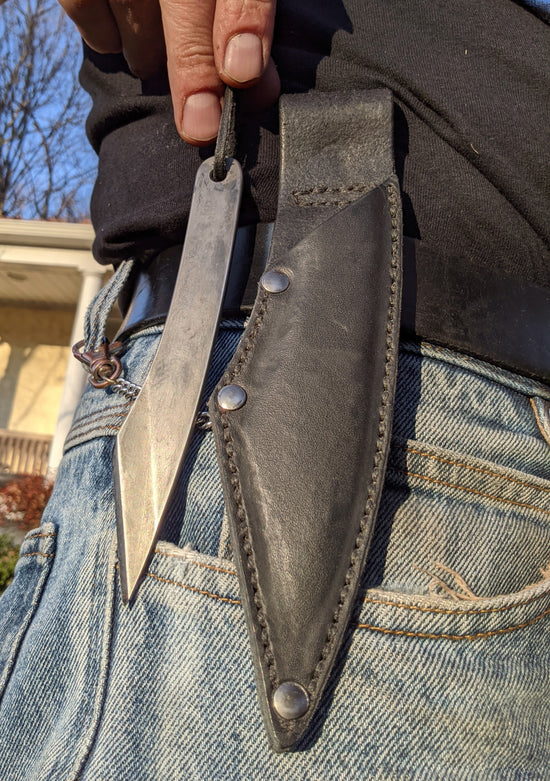
Traditional belt knife sheath in use.
-
Compact sheath for a small belt knife.
-

The above sheath on a belt.
-
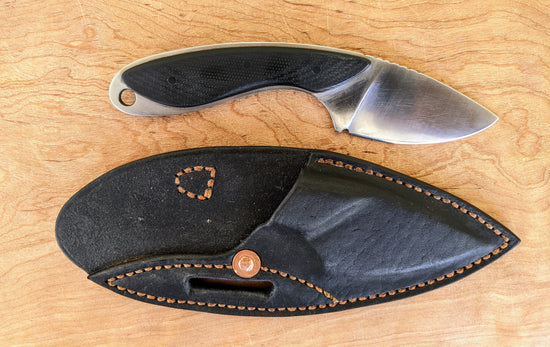
A Kiridashi and sheath.
-

Another Kiradashi and leather sheath.
-

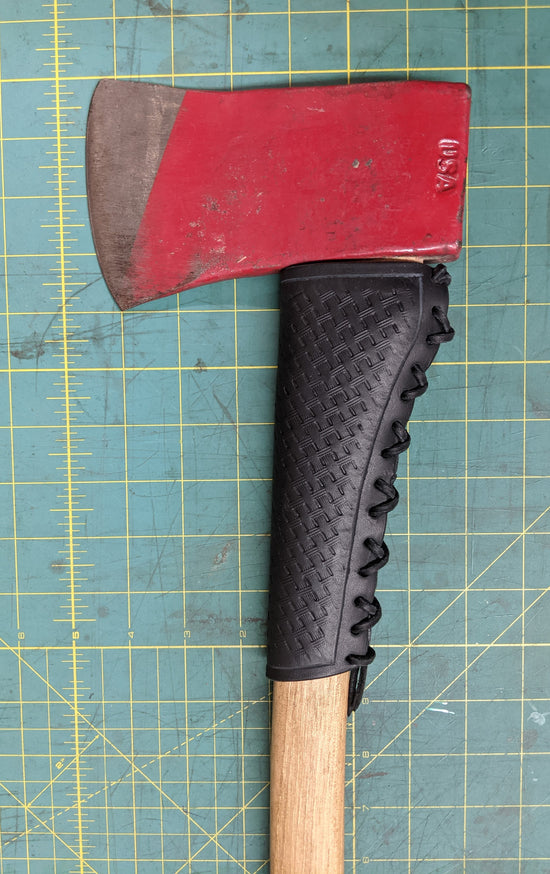
Hatchet Collar Guard
A simple collar guard on a hatchet laced up at the rear.
-
Axe Collar Guard
Example of a fancy axe collar with basket weave tooling.


Repair and Sharpening
-
Repair Work on Knives
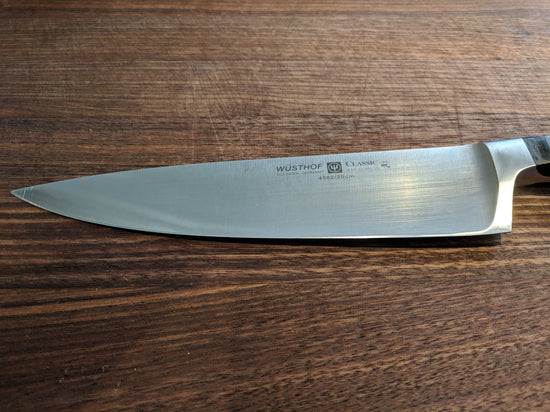
We will gladly perform repair work on any of our own knives, and most production knives. Anything you purchased from a box store or online retailer. We do NOT perform repair work on other makers custom knives. We have no knowledge of what steel was used to make these or how they were heat-treated. Some of these knives are very high ticket items and we can not assume the liability for executing repair work on them. We also do NOT perform repair work on authentic Japanese knives. We do not have the skill sets or equiptment to do so.
-
Example of typical repair work
This kitchen utility knife came in needing a new handle and shapening. The owner was offerd a selection of handle materials to choose from.
-
Disasembly
Handle material removed and rusty short tang exposed.
-
Preparation work
Tang cleaned up, handle material drilled out and pin prepared.
-

Preparation for final assembly
The bolster has been cleaned up and masked. Spacers have been created and the whole thing is ready for glue up.
-

The repaired knife
All cleaned up and ready to go home.
-
Sharpening
We gladly sharpen knives of our own creation as well as production knives. We do NOT sharpen other makers custom knives or authentic Japanese knives.
-

Sharpening/Repair
Some knives come in needing a little more than just sharpening. That's OK, we can usualy fix it. Although the knife will be a little smaller after repair and sharpening.
-
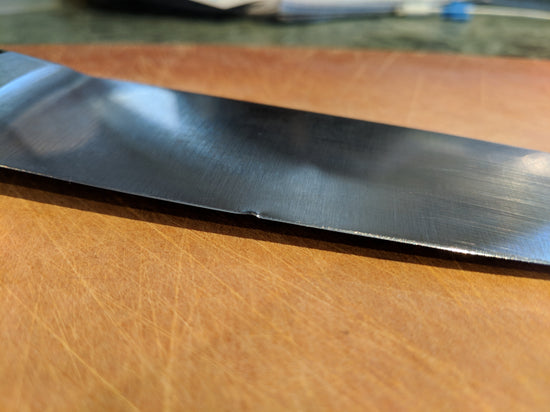
Sharpening/Repair
Detail view of dent in cutting edge
-
Sharpening/Repair
All cleaned up and sharp again.


